How to Get Your Website on Google: Complete Step-by-Step Guide 2025
The definitive guide to getting your new website discovered, crawled, and indexed by Google's search engine through proven strategies and tools.

For a new website to appear in Google’s search results, it must first be discovered and indexed. While Google’s automated systems will eventually find most sites, you can directly influence this process to ensure it happens quickly and correctly. This guide provides the definitive, step-by-step method for getting your website on Google.
This guide covers:
- How Google Discovers Content: A clear explanation of crawling, indexing, and the role of links.
- Pre-Indexing Best Practices: Critical on-site checks you must perform before asking Google to index your site.
- Google Search Console Setup: A walkthrough of how to set up the essential free tool used to manage your site’s presence on Google.
- Core Indexing Actions: The exact steps to submit a sitemap and request indexing.
- Post-Indexing Strategy: What to do after your site is on Google to monitor its health and grow its presence.
How Google Discovers and Indexes Websites
Understanding the discovery process is the first step. The goal is not to “submit” your site, but to make it easy for Google’s automated systems to find and understand it.
Crawling vs. Indexing
These two terms define the process. They are sequential and distinct.
- Crawling: This is the discovery process. Google uses automated programs called crawlers (e.g., Googlebot) to browse the web, following links from one page to another to find new or updated content.
- Indexing: After crawling a page, Google analyzes its content and stores it in a massive database known as the Google Index. For your site to appear in search results, its pages must be in this index.
The Role of Links in Discovery
Googlebot discovers new content primarily by following links from pages it already knows about. If a reputable, crawled website links to your new website, that link acts as a pathway for Googlebot to find you. However, relying on this passive discovery can take weeks or months. The steps in this guide create a direct pathway instead of waiting for others to build one for you.
Why Google Might Not Find Your Site Automatically
Several factors can prevent Google from discovering your site naturally:
- No External Links: If no other websites link to yours, Google has no pathway to find you.
- Technical Barriers: Issues like server errors, slow loading times, or improper redirects can block crawlers.
- Poor Site Structure: Sites with confusing navigation or broken internal links are harder for crawlers to understand.
- New Domain: Brand new domains with no history take longer to gain Google’s trust and attention.
Pre-Indexing Checklist: 5 Things to Do Before You Start
Before asking Google to index your site, performing these checks can save you from significant headaches. Many indexing problems are self-inflicted and can be fixed in minutes.
1. Check for “noindex” Tags
A noindex meta tag is a piece of code placed in the <head> section of a webpage that explicitly tells search engines not to add the page to their index. This is the most common reason a page won’t appear on Google.
- How to Check: Right-click on your webpage and choose “View Page Source.” Search (
Ctrl+ForCmd+F) for the word “robots”. - What to Look For: If you see
<meta name="robots" content="noindex">or<meta name="googlebot" content="noindex">, that page is being blocked. - The Fix: This tag is often added by developers during site construction and forgotten. In WordPress, this can also be controlled by the “Discourage search engines from indexing this site” setting under Settings > Reading. Ensure this box is unchecked.
2. Review Your robots.txt File
The robots.txt file is a simple text file located at yourdomain.com/robots.txt. It gives instructions to web crawlers. While it has legitimate uses, an incorrect rule can block your entire website.
- How to Check: Go to
yourdomain.com/robots.txtin your browser. - What to Look For: Look for any lines that say
Disallow: /. This single line tells bots not to crawl any pages on your site. - The Fix: For most websites, you want to ensure there is no
Disallow: /rule. If you see it, you must edit the file to remove it.
3. Ensure Key Pages Are Internally Linked Pages that have no links pointing to them from other pages on your own site are called “orphaned pages.” They are difficult for both users and Google crawlers to find. Ensure your most important pages are linked from your main navigation menu, your homepage, or other relevant pages.
4. Perform Basic On-Page SEO Checks Google uses on-page signals to understand a page’s topic. Ensure your key pages have:
- A clear and descriptive
<title>tag - A single, relevant
<h1>heading that summarizes the page content - Meta descriptions that accurately describe the page content
- Proper heading structure (
H1,H2,H3) that organizes your content logically
5. Test Your Site’s Loading Speed Slow-loading websites are less likely to be crawled frequently. Use tools like Google PageSpeed Insights or GTmetrix to check your site’s loading speed. If your site takes more than 3-4 seconds to load, address the most critical issues before proceeding.
Google Search Console: The Essential Tool for Site Owners
Google Search Console (GSC) is a free service that acts as a direct link between your website and Google Search. It provides the data and tools necessary to get your site indexed and monitor its performance. Using GSC is not optional for any serious website owner.
Key Functions of Google Search Console
- Performance Monitoring: See which search queries bring users to your site, along with clicks, impressions, and average ranking positions.
- Index Coverage Reporting: Understand which pages have been successfully indexed and get details on any errors that prevent other pages from being indexed.
- Sitemap Submission: Give Google a direct map of all the pages on your site.
- Security & Manual Action Alerts: Get notified by Google if your site is hacked or has been penalized for violating guidelines.
- URL Inspection Tool: Check the indexing status of individual pages and request priority crawling.
- Core Web Vitals Data: Monitor your site’s user experience metrics that affect rankings.
Step 1: Set Up and Verify Your Website in Google Search Console
Before you can use GSC, you must prove you own the website. This process is called verification.
Add Your Website as a Property
Google Search Console Homepage
First, navigate to Google Search Console and sign in with your Google account. You will be prompted to add your website, which GSC refers to as a “property.” You have two options for property type:
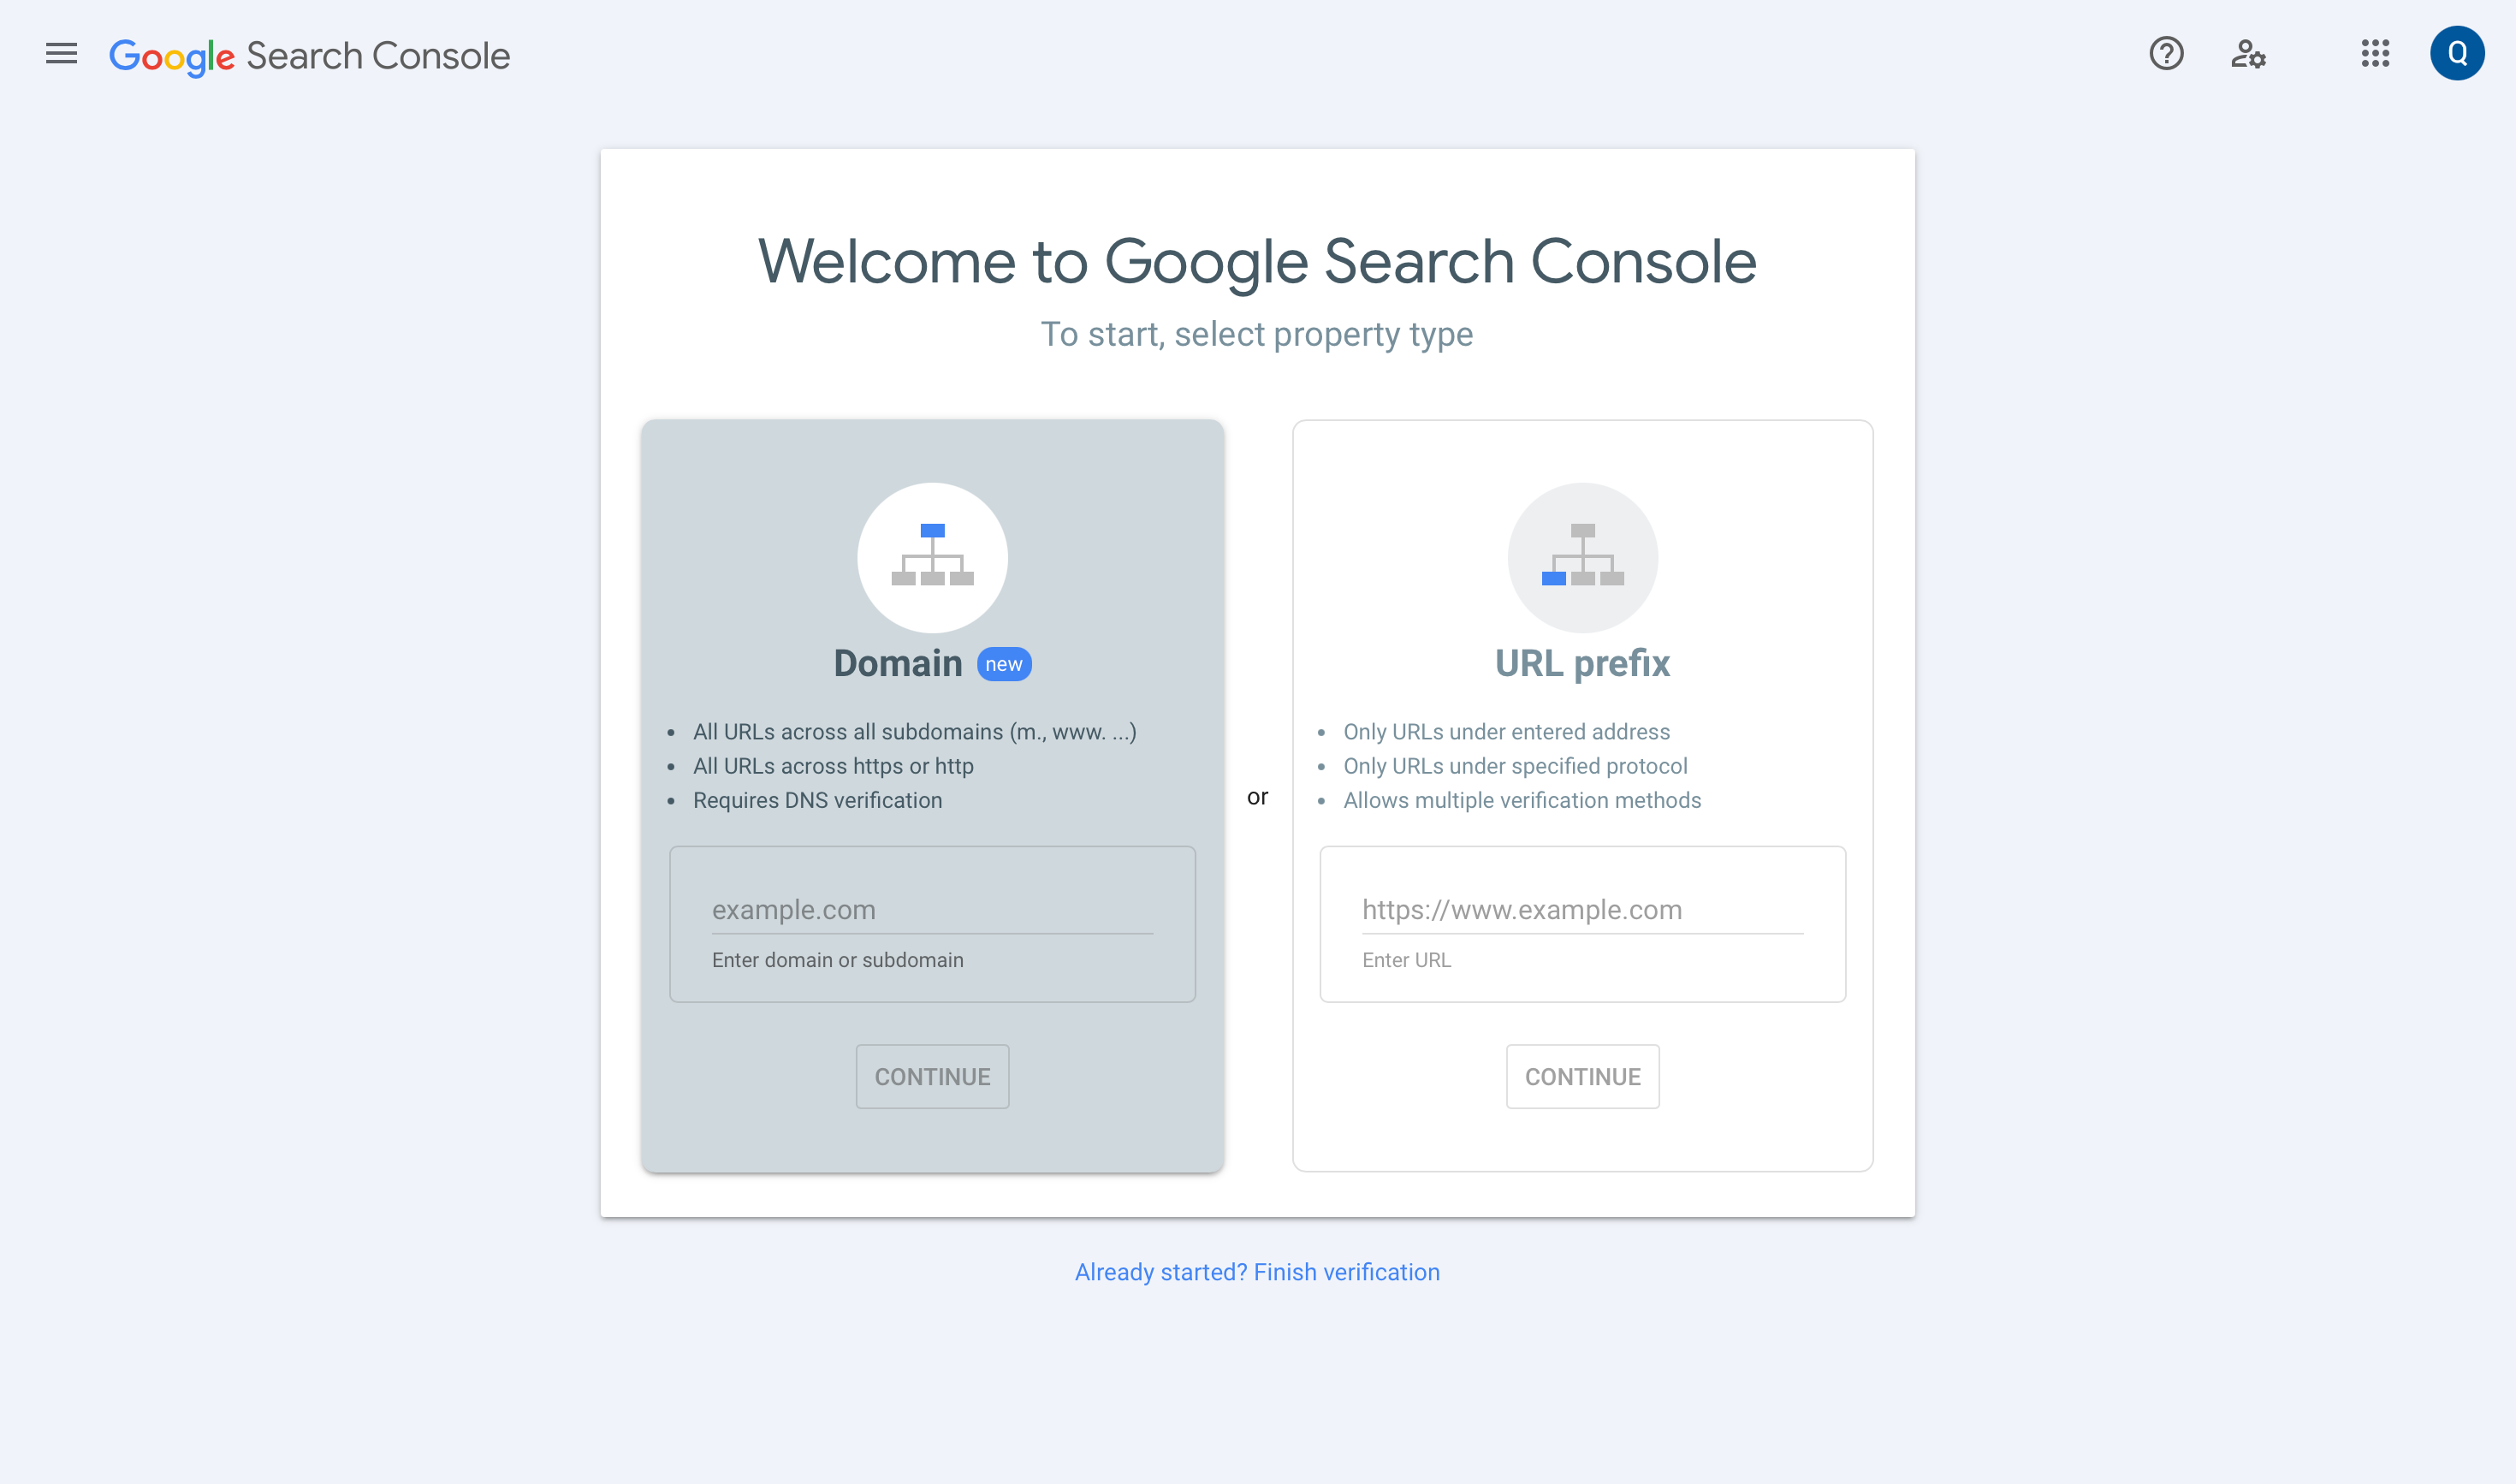
Google Search Console interface for selecting a property
- Domain Property (Recommended): This option covers your entire domain, including all subdomains and protocol variations (http, https, www, non-www). It is the most comprehensive method and requires DNS verification.
- URL Prefix Property: This older method only covers the exact URL you enter. It offers more verification options but is less complete.
Select the Domain property type and enter your domain name (e.g., yourdomain.com).
Verify Domain Ownership via DNS Record
To verify a Domain property, you must add a specific TXT record to your domain’s DNS settings. GSC will provide you with a unique string of text for this purpose.
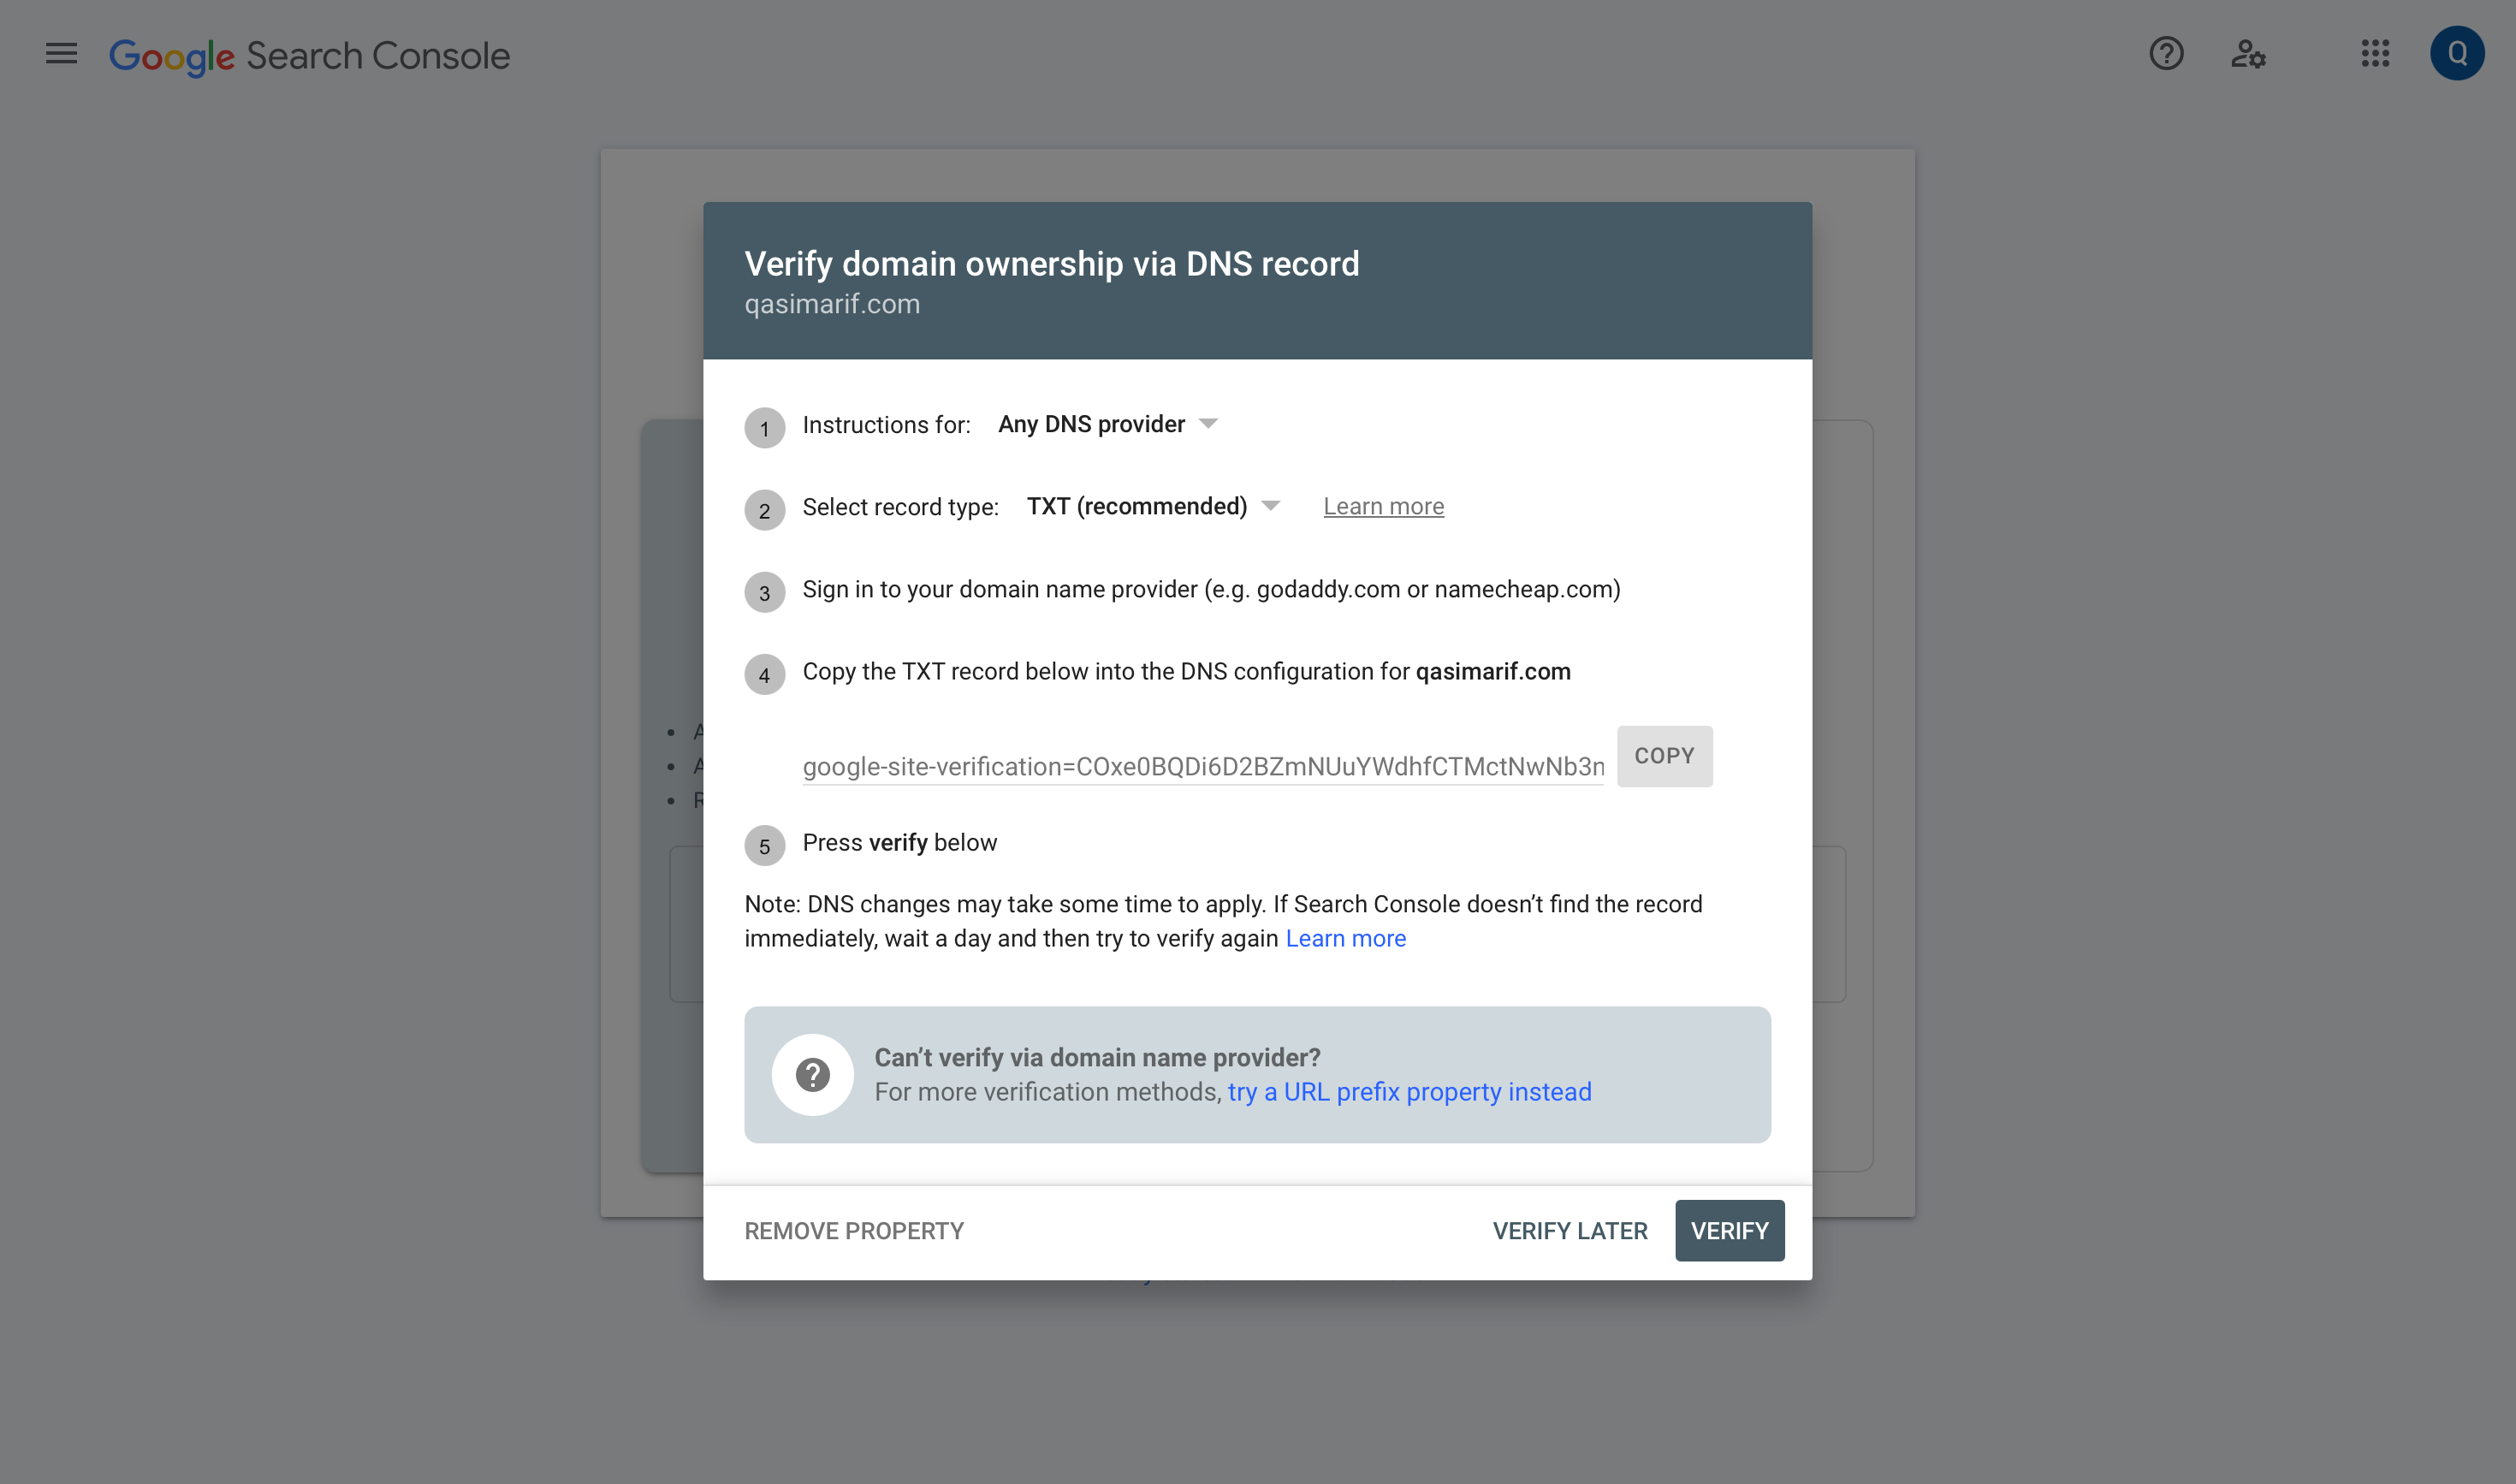
The Google Search Console interface verification via DNS records
Step-by-Step Process:
- Log in to your Domain Registrar: Access the account where you purchased your domain name (e.g., GoDaddy, Namecheap, Squarespace).
- Navigate to DNS Management: Find the settings page for managing DNS records for your domain. This might be called “DNS Management,” “DNS Settings,” or “Advanced DNS.”
- Create a New TXT Record: Add a new record with the type set to TXT.
- Paste the GSC Value: Copy the unique
google-site-verification=string from Google Search Console and paste it into the “Value,” “Content,” or “Points to” field. - Save the Record: Save the new DNS record. DNS changes can take anywhere from a few minutes to several hours to propagate.
- Click “Verify”: Return to Google Search Console and click the “Verify” button. Once Google detects the new TXT record, your ownership will be confirmed.
Alternative Verification Methods
If you chose the URL Prefix property or cannot access DNS settings, other verification methods include:
- HTML File Upload: Download an HTML file from GSC and upload it to your website’s root directory.
- HTML Tag: Add a meta tag to your homepage’s
<head>section. - Google Analytics: If you already have Google Analytics installed, you can verify through that connection.
- Google Tag Manager: Similar to Analytics, you can verify through an existing GTM installation.
Common Verification Issues & Solutions
- Problem: Verification fails with a “we couldn’t find your verification token” error.
- Solution: DNS changes are not always instant. This is called “DNS propagation.” Wait for an hour and try clicking “Verify” again. If it still fails, double-check that you copied the TXT value exactly and saved it correctly in your DNS settings.
- Problem: You cannot find or access your DNS settings.
- Solution: Your DNS is managed by your domain registrar or your web hosting provider. Contact their support team for assistance in adding the TXT record.
- Problem: Multiple verification methods fail.
- Solution: Ensure your website is actually accessible. Try visiting your domain in an incognito browser window. If it doesn’t load, fix the hosting issue first.
Step 2: Tell Google Which Pages to Index
Once verified, you can take two core actions to guide Google’s crawlers effectively.
Submit Your XML Sitemap
An XML sitemap is a file that lists all your important URLs, along with metadata about each page. Submitting it is the most efficient way to tell Google about all the pages you want to have indexed.
Understanding XML Sitemaps
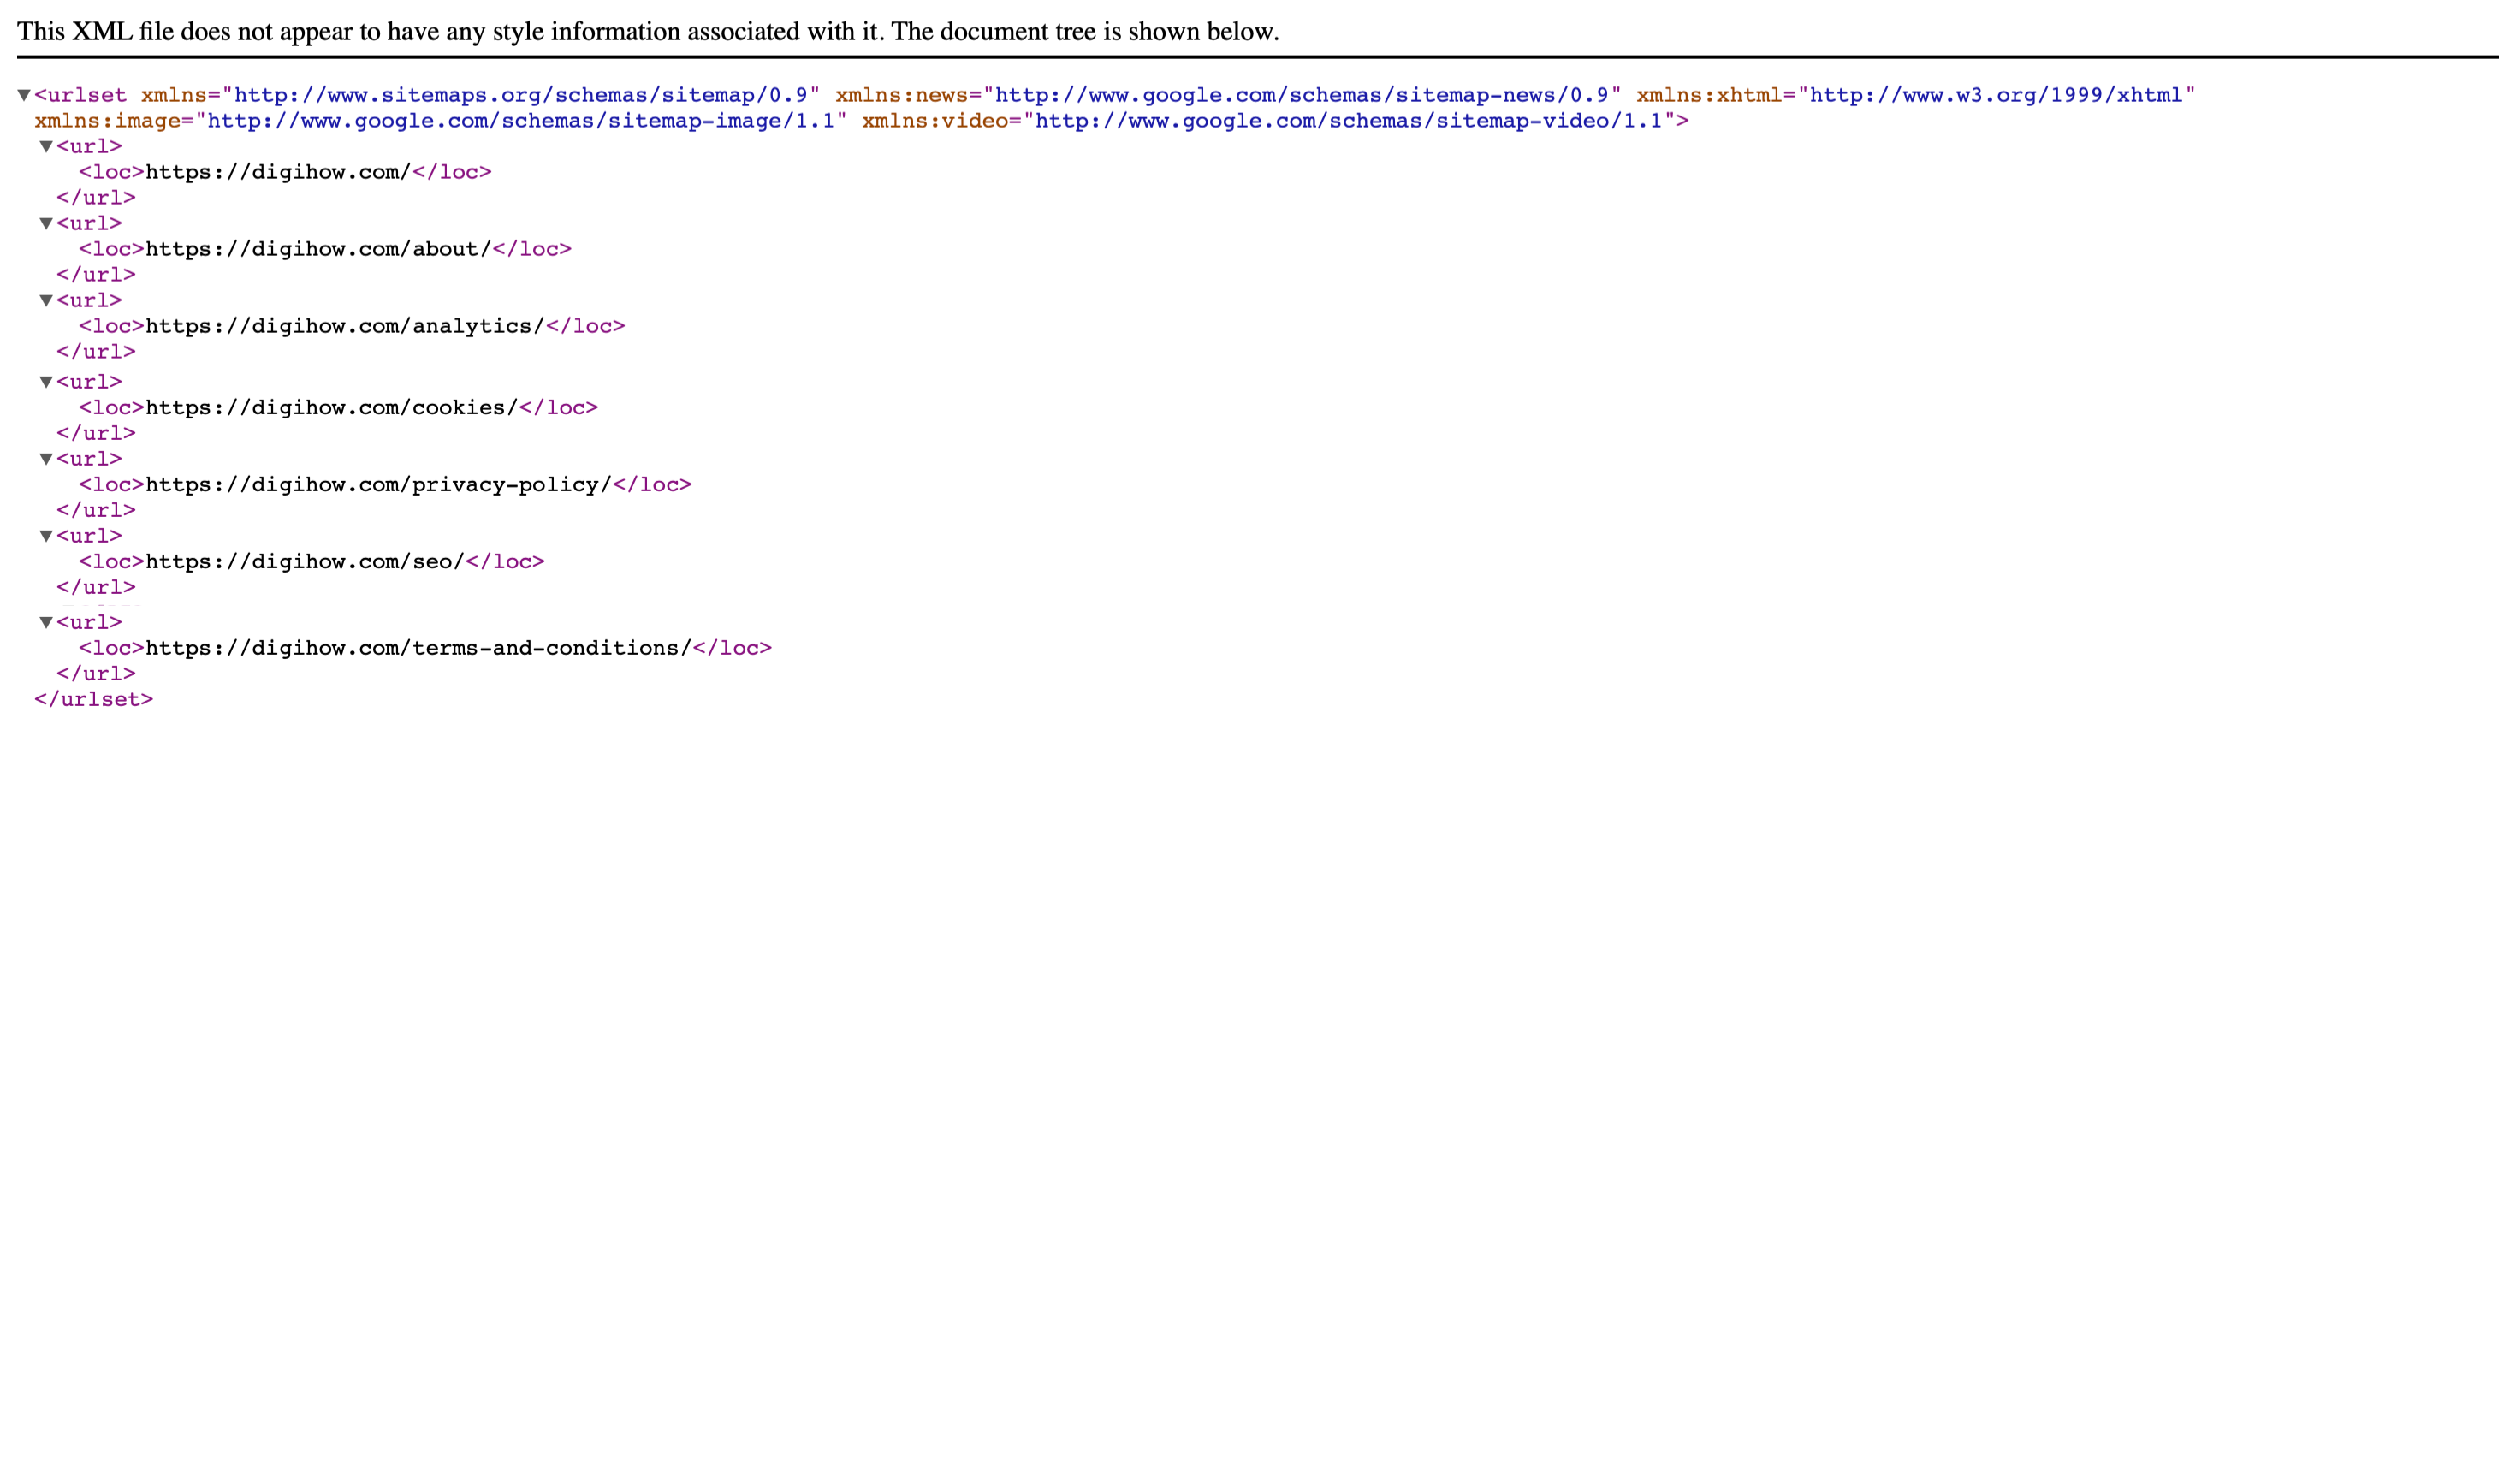
A sample XML sitemap of DigiHow.com
A sitemap serves as a roadmap of your website for search engines. To learn more, you can read Google’s official documentation on learning about sitemaps. It includes:
- URLs: Every important page on your site
- Last Modified Date: When each page was last updated
- Priority: How important each page is relative to others on your site
- Change Frequency: How often the page content typically changes
How to Submit Your Sitemap
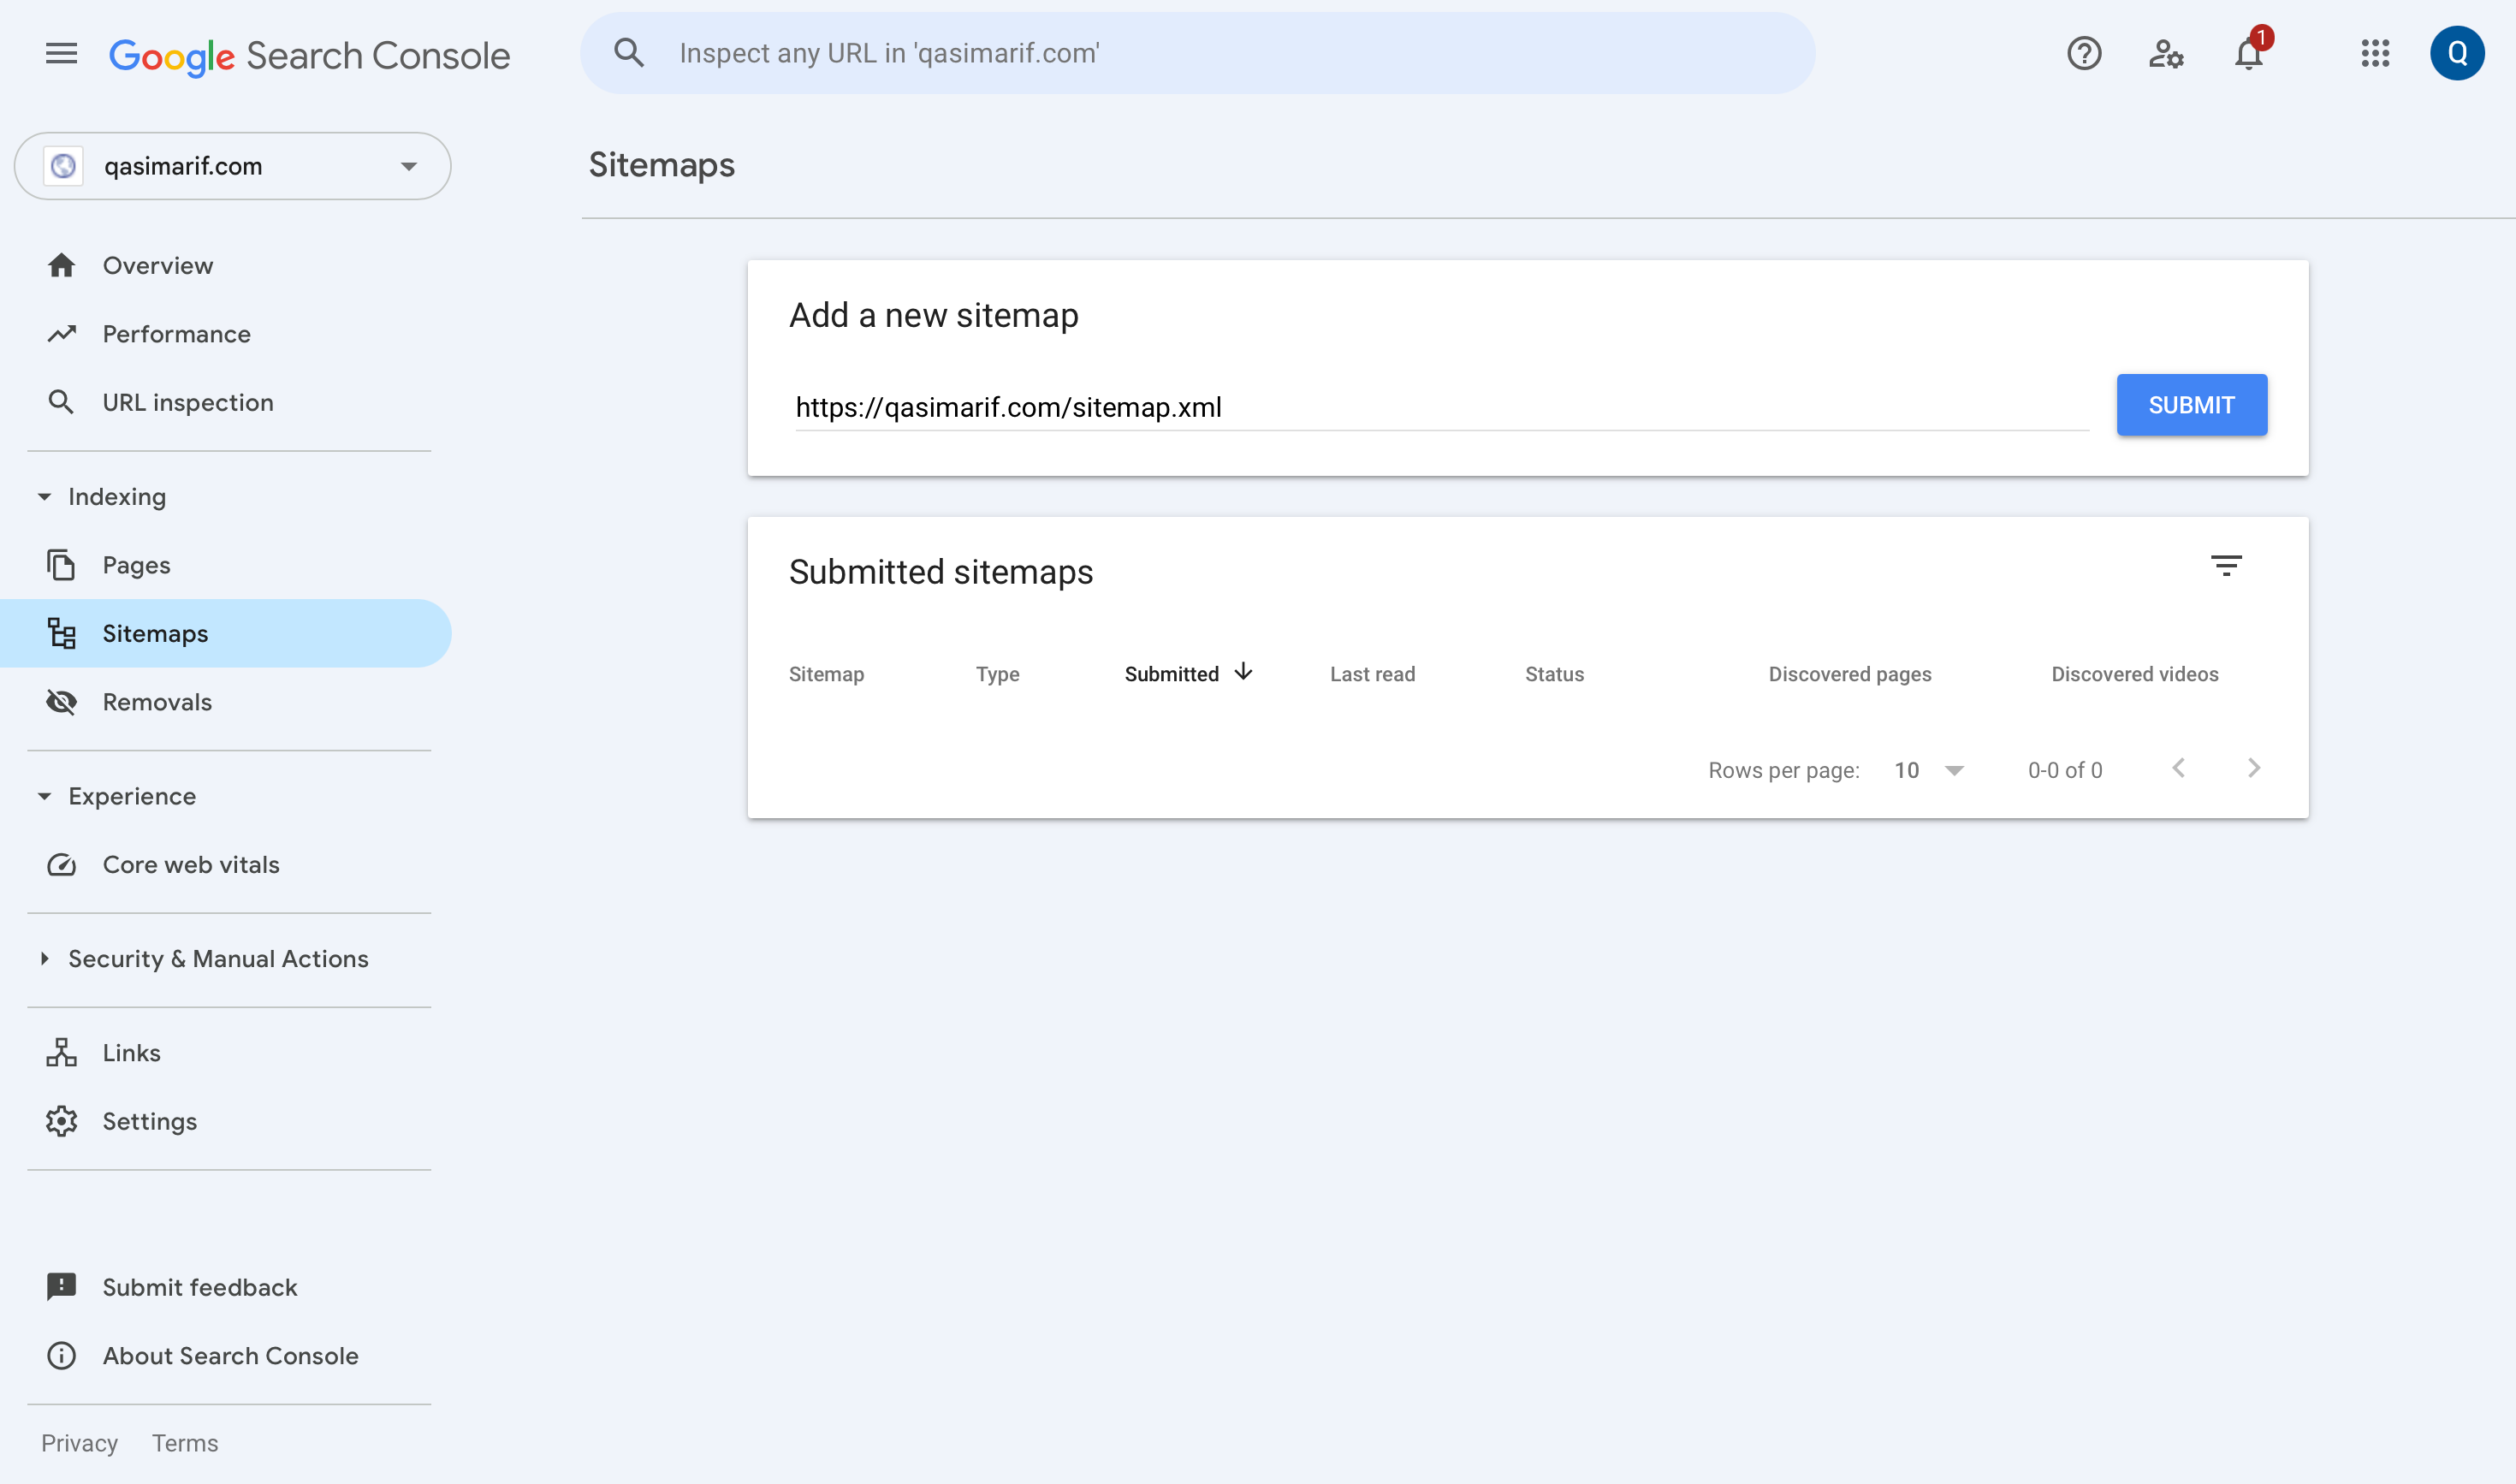
Google Search Interface for sitemap submission
- Locate Your Sitemap: Most modern website platforms automatically generate a sitemap for you:
- WordPress: Usually at
yourdomain.com/sitemap.xmloryourdomain.com/sitemap_index.xml - Shopify:
yourdomain.com/sitemap.xml - Squarespace:
yourdomain.com/sitemap.xml - Wix:
yourdomain.com/sitemap.xml
- Navigate to Sitemaps in GSC: In the left-hand menu of your GSC dashboard, click on “Sitemaps.”
- Add the Sitemap URL: In the “Add a new sitemap” field, enter the URL of your sitemap file (e.g.,
sitemap.xmlorsitemap_index.xml). - Click “Submit”: GSC will now use this file as a guide for crawling your site.
You only need to do this once. GSC will periodically re-crawl the sitemap file to find new content automatically.
Request Indexing for Specific URLs
For brand-new or recently updated pages, you can ask Google to crawl them on a priority basis using the URL Inspection Tool.
When to Use This Feature:
- You’ve just published a time-sensitive article.
- You’ve made significant updates to an important existing page.
- You’ve fixed technical issues on a page that wasn’t being indexed.
How to Request Indexing:
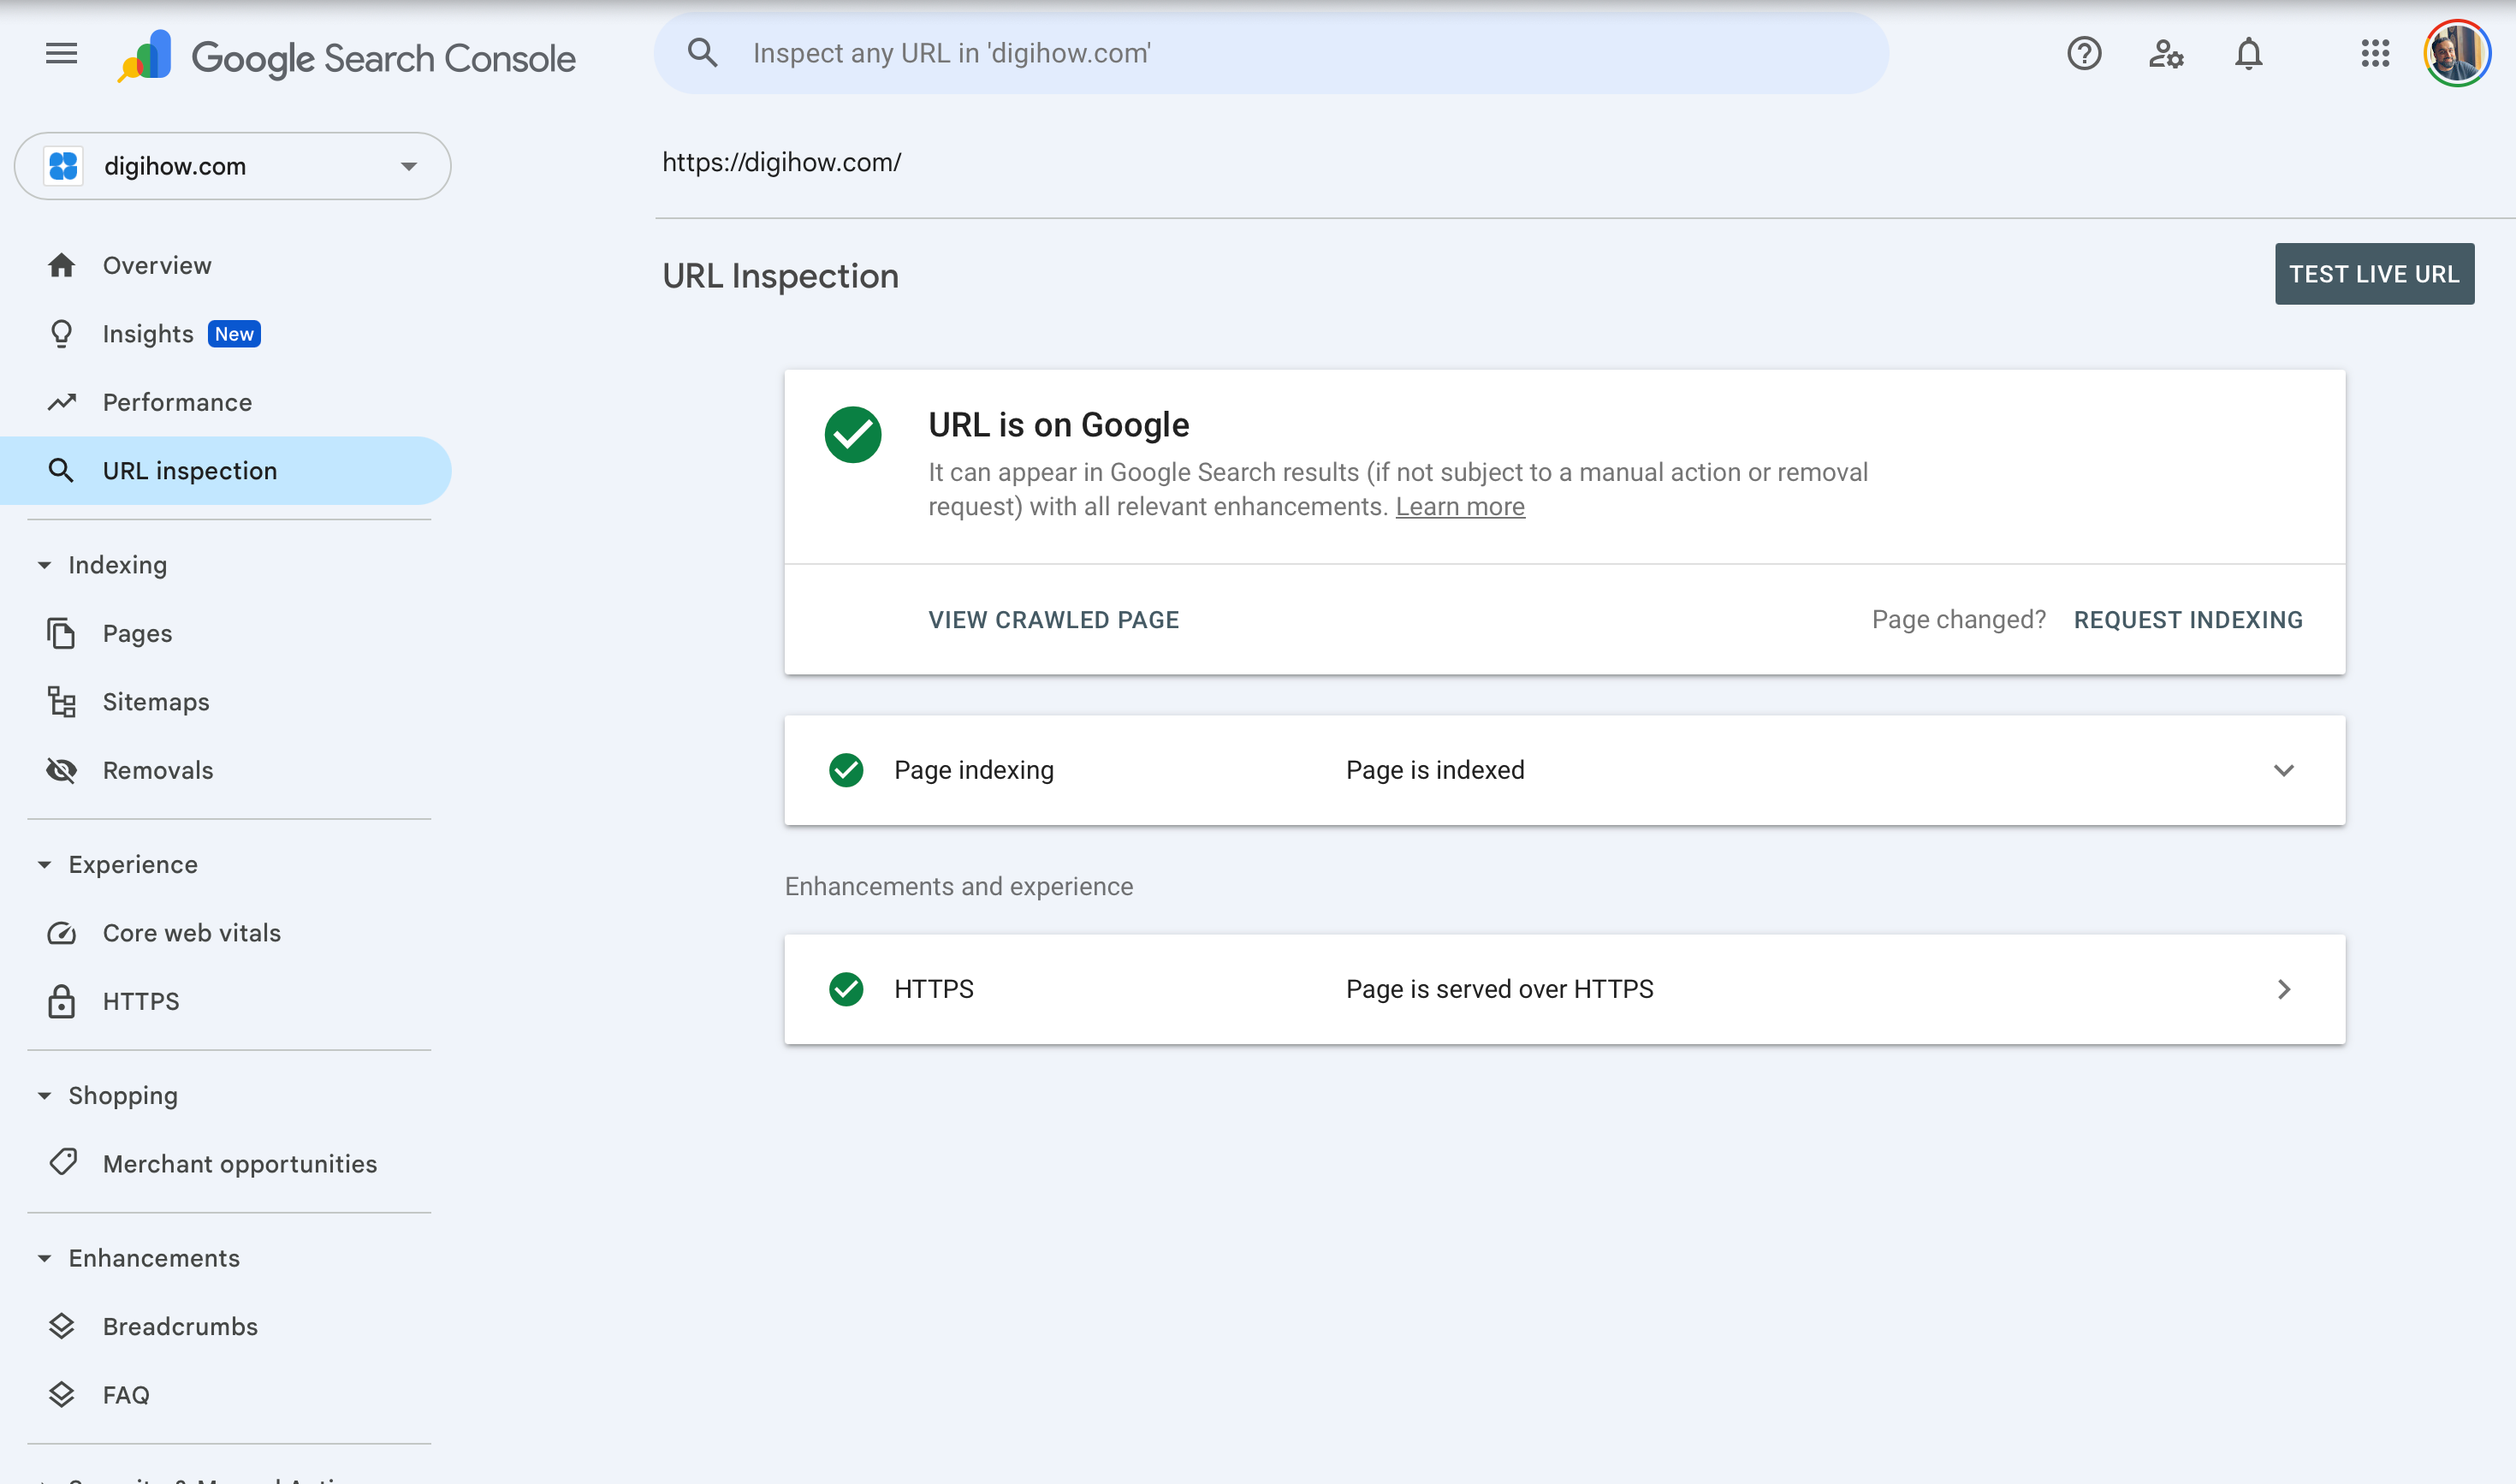
Google search console url inspection tool showing digihow.com being indexed
- Open the URL Inspection Tool: Paste the full URL of the page you want indexed into the search bar at the top of Google Search Console.
- Check the Status: GSC will report the current indexing status of the page from Google’s perspective.
- Request Indexing: If the page is not indexed, you’ll see a “Request Indexing” button. Click it to add the URL to a high-priority crawl queue.
Use this feature sparingly for your most important content. Google has daily limits on how many indexing requests you can make.
Step 3: Monitor and Confirm Your Indexing Status
After completing the previous steps, you need to monitor the results and ensure everything is working correctly.
How Long Does Google Indexing Take?
Indexing is not instant. For a new site, it typically takes from a few days to a few weeks. The speed is influenced by several factors:
- Site Authority: New sites with no backlinks take longer to get crawled frequently by Google.
- Content Quality: High-quality, unique content is prioritized over thin or duplicate content.
- Crawlability: A clean site structure, fast loading times, and a submitted sitemap speed things up significantly.
- Competition: Popular topics with lots of existing content may take longer to index new pages.
How to Check if Your Site Is on Google
Use the site: search operator for a quick and comprehensive check:
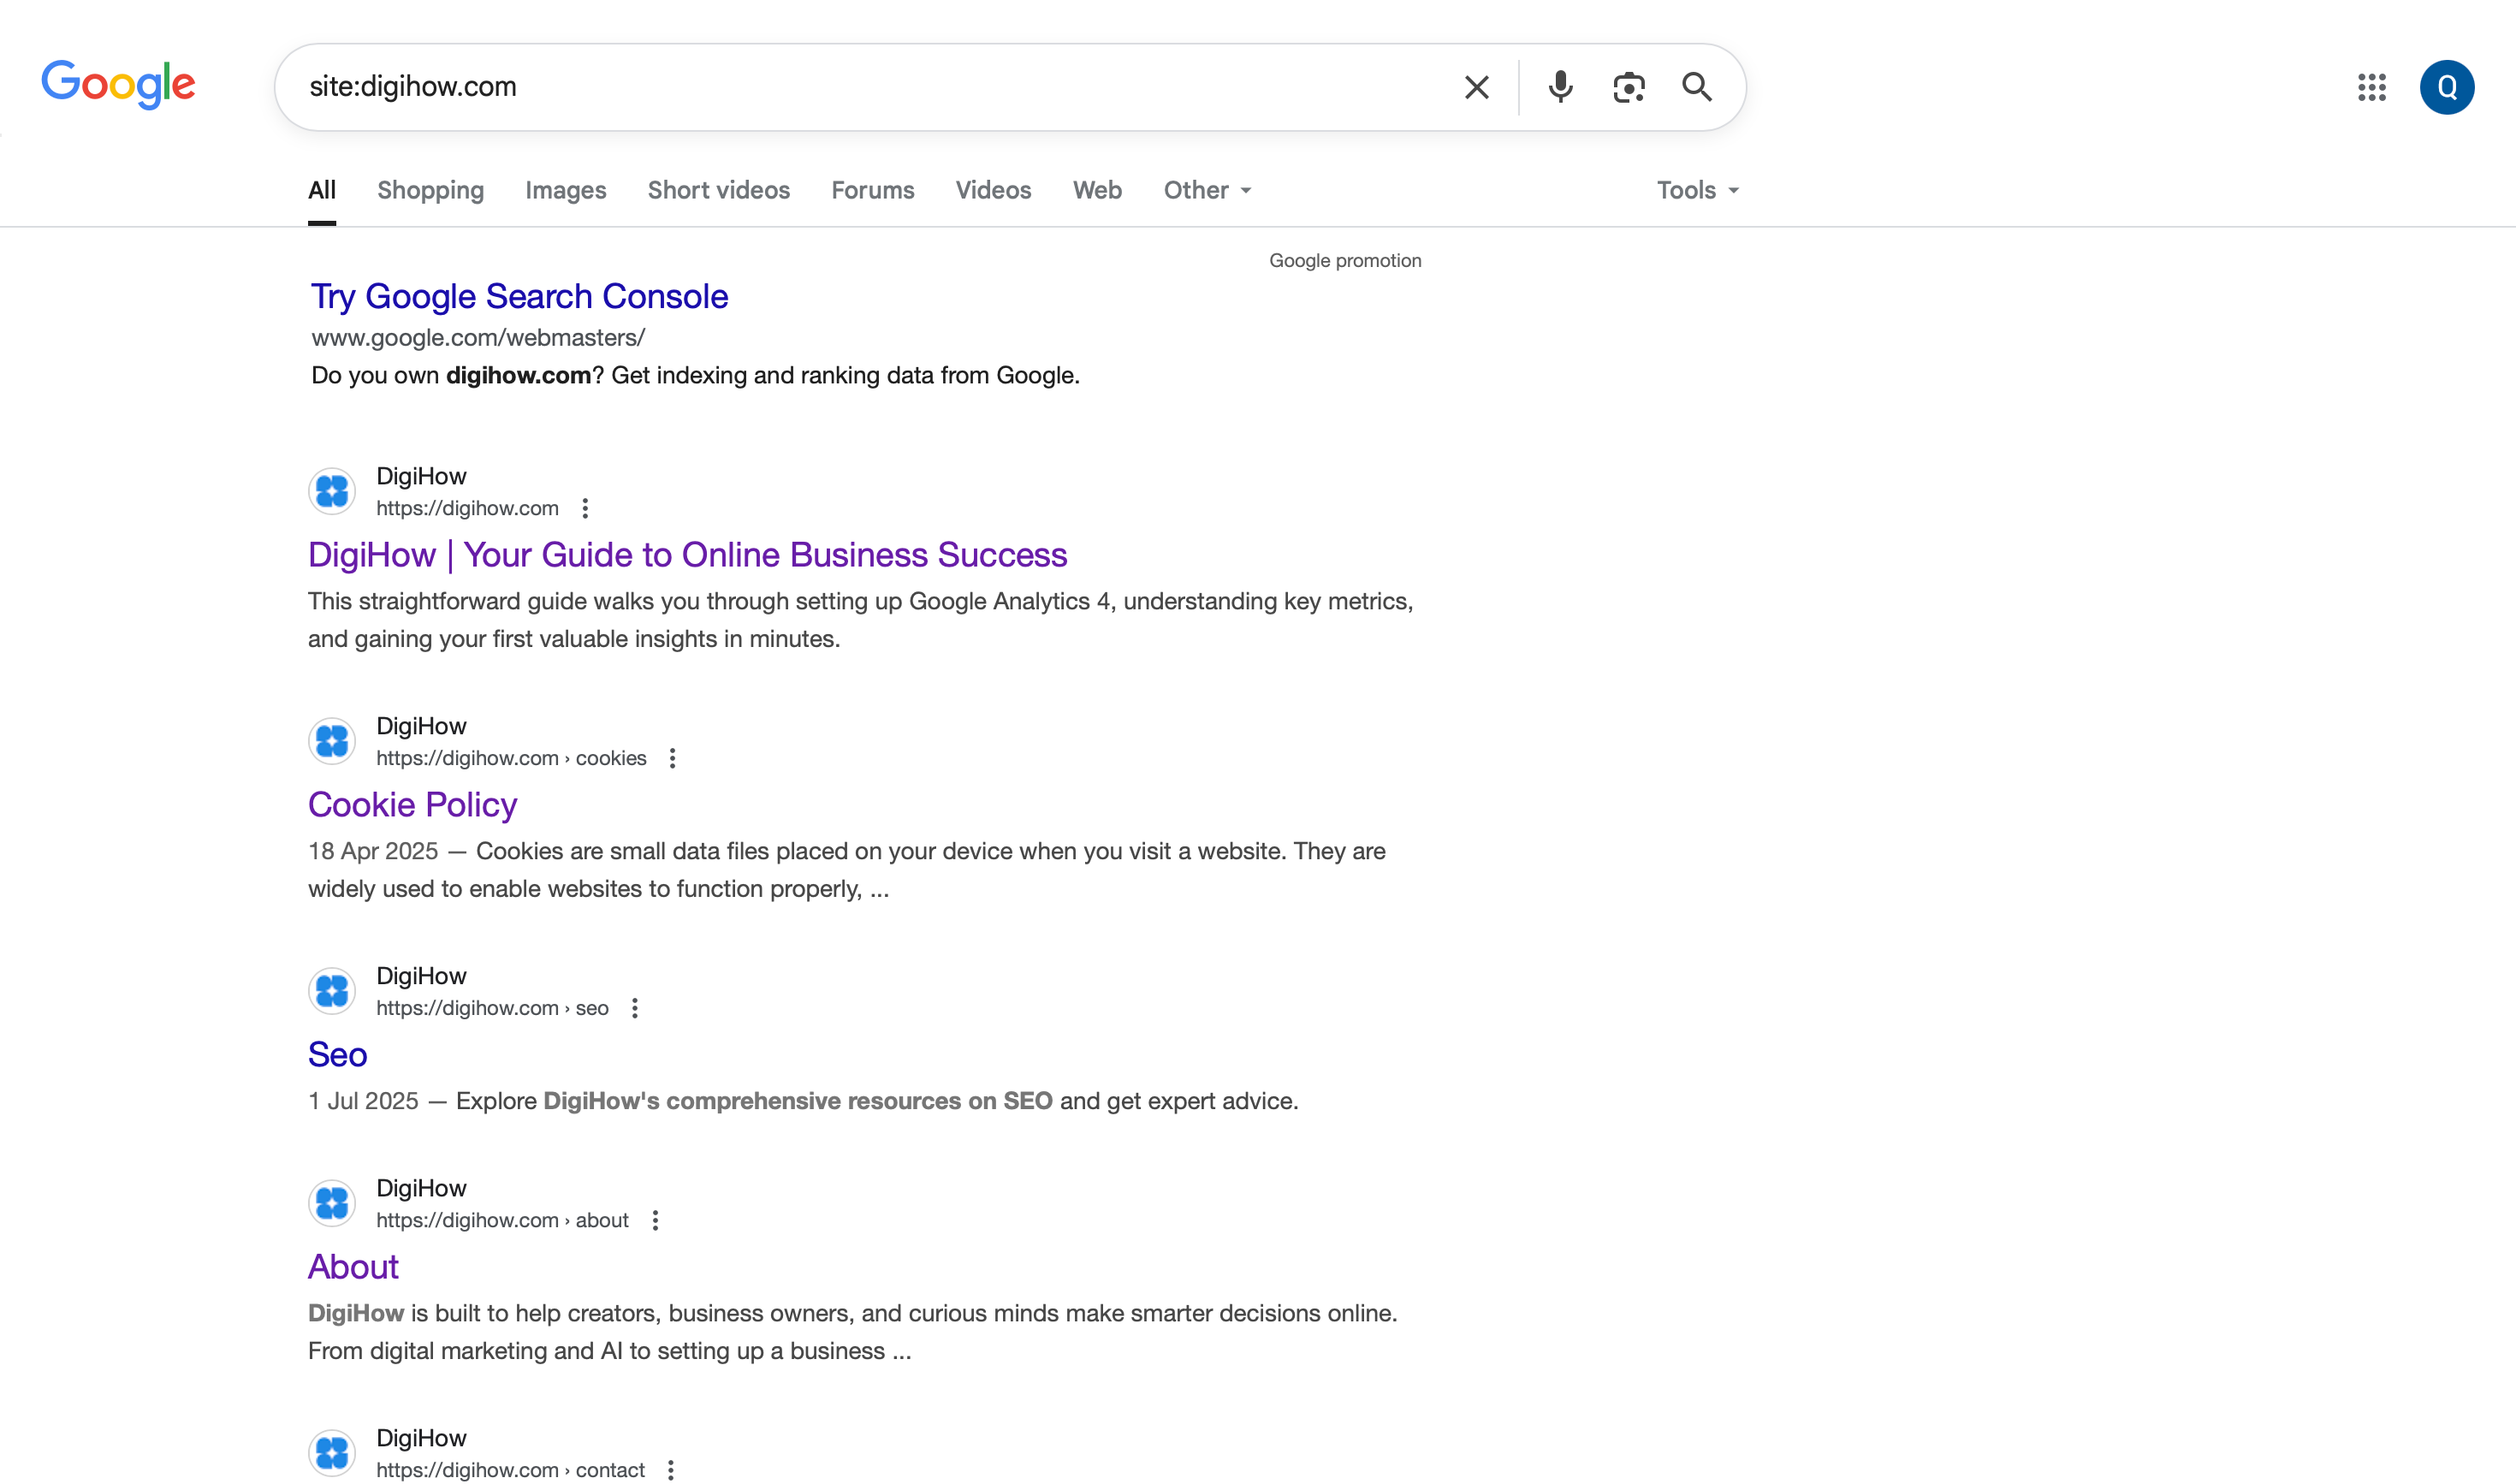
A Google Search of site:digihow.com
- Go to Google.com
- Type
site:yourdomain.cominto the search bar, replacingyourdomain.comwith your actual domain. - Review the results.
If Google returns a list of your website’s pages, your site has been successfully indexed. If it returns “Your search did not match any documents,” your site has not yet been indexed or there may be a technical issue preventing it.
Using Google Search Console for Detailed Monitoring
The GSC dashboard provides much more detailed information than a simple site: search:
- Pages Report: Shows you exactly which pages are indexed and which are not, along with specific reasons for any indexing issues.
- Sitemaps Report: Confirms whether your sitemap has been successfully processed and shows any errors.
- URL Inspection Tool: Provides detailed information about individual pages, including when they were last crawled and any issues found.
What to Do After Your Site Is Indexed
Getting indexed is just the beginning. The next step is to monitor your site’s health and work on improving its visibility and rankings.
Google Search Console tells you what happens before a user clicks to your site. To understand what they do after they arrive—which pages they visit, how long they stay, and what actions they take—you need Google Analytics. Learn how to set it up in The Ultimate Guide to Google Analytics 4 for Beginners.
Monitor the Index Coverage Report
Inside Google Search Console, the “Pages” report (under Indexing) is your primary health dashboard. Check it weekly, especially in the first month after indexing. It will show you:
- The total number of pages that are indexed
- A list of pages that are not indexed and the specific reason why
- Trends in your indexing over time
- Warnings about potential issues
Seeing lots of errors and excluded pages? Don’t panic. Most of these are normal - learn which Search Console errors to ignore and which ones actually matter.
Common Indexing Issues and Solutions
- “Crawled - currently not indexed”: Google found the page but decided not to index it, often due to low quality or duplicate content. Improve the content’s uniqueness and value.
- “Discovered - currently not indexed”: Google knows about the page but hasn’t crawled it yet. This is normal for new sites; be patient or use the URL Inspection tool to request indexing.
- “Page with redirect”: The URL redirects to another page. Ensure this is intentional, or fix any redirect loops.
- “Duplicate without user-selected canonical”: Multiple pages have similar content. Use canonical tags to indicate which version should be indexed.
Focus on Content and Topical Authority
Indexing makes your site eligible to appear in search results; it does not guarantee high rankings. Ranking is earned through creating high-quality, helpful content that demonstrates your expertise on a given topic.
Building Topical Authority:
- Consistently publish valuable content in your niche.
- Cover topics comprehensively, not just superficially.
- Link related articles together to show the depth of your knowledge.
- Update and improve existing content regularly.
- Build relationships with other authoritative sites in your space.
Monitor Your Performance
Use the Performance report in GSC to track:
- Impressions: How often your pages appear in search results.
- Clicks: How often people click through to your site.
- Click-through Rate (CTR): The percentage of impressions that result in clicks.
- Average Position: Where your pages typically rank for their target keywords.
Technical & Content Maintenance
- Regular Health Checks: Monitor loading speed, check for broken links, ensure your SSL certificate is valid, and keep your CMS and plugins updated.
- Content Maintenance: Update outdated articles, add new internal links, expand thin content, and remove or redirect low-quality pages.
Advanced Tips for Faster Indexing
Build Quality Backlinks
External links from reputable websites signal to Google that your content is valuable and should be crawled more frequently. Focus on:
- Creating genuinely useful content that others want to link to.
- Building relationships with other site owners in your niche.
- Guest posting on established, relevant websites.
- Getting listed in relevant online directories.
Optimize Your Internal Linking
Help Google understand your site structure by:
- Linking to your most important pages from your homepage.
- Creating clear navigation paths between related content.
- Using descriptive anchor text for internal links.
- Ensuring no important pages are more than 3-4 clicks from your homepage.
Leverage Social Media
While social signals don’t directly impact indexing, they can help your content get discovered faster:
- Share new content on your social media profiles.
- Engage with industry communities and forums.
- Encourage social sharing of your best content.
Troubleshooting Common Problems
My Site Still Isn’t Indexed After Weeks
- Possible Causes: Technical issues blocking crawlers, very low-quality content, server reliability problems, or manual penalties (rare for new sites).
- Solutions: Use the URL Inspection Tool to check for specific errors, review your
robots.txtfile again, check server logs, and ensure your site loads reliably.
Only My Homepage Is Indexed
- Possible Causes: Poor internal linking structure, individual pages blocked by
noindextags, or an improperly formatted sitemap. - Solutions: Improve internal navigation, check each important page for
noindextags, and validate your sitemap using an online tool like XML-Sitemaps.com’s validator.
Pages Are Indexed But Not Ranking This is normal and expected. Indexing and ranking are separate processes. Focus on:
- Creating higher-quality, more comprehensive content.
- Building topical authority in your niche.
- Improving your site’s technical SEO.
- Earning quality backlinks over time.
Conclusion
Getting your website on Google is a foundational step that every site owner must master. By following the systematic approach outlined in this guide—from the pre-indexing checklist through Google Search Console setup and ongoing monitoring—you give your site the best possible chance of being discovered quickly and accurately by Google’s crawlers.
Once your site is indexed, your Search Console dashboard will show various errors and warnings. Learn which ones are normal vs. which ones need fixing.
Remember that indexing is just the beginning. Your long-term success depends on consistently creating valuable content, maintaining technical excellence, and building authority in your niche. The tools and processes covered in this guide will serve as your foundation for all future SEO efforts.
The most important takeaway is this: don’t wait for Google to find you. Take control of the process, monitor your results, and continuously improve your site’s quality and user experience. This proactive approach will serve you well throughout your website’s growth journey.
Frequently Asked Questions
How long does it take for my site to get on Google?
For a new site, indexing can take anywhere from a few days to several weeks. Factors like your site’s quality, how easily it can be crawled, and whether other sites link to you all play a role. Following the steps in this guide—especially submitting an XML sitemap in Google Search Console—is the most effective way to speed up the process.
Do I have to pay to get my website on Google?
No, getting your site indexed by Google is completely free. Google Search Console is a free tool provided by Google. Be cautious of any third-party service that charges a fee for “guaranteed submission,” as this is a process you can and should manage yourself at no cost.
Do I need to submit every new page I publish?
No. Once your sitemap is submitted, Google will automatically discover your new pages when it re-crawls the sitemap file. You should only use the “Request Indexing” feature in the URL Inspection Tool for particularly important or time-sensitive pages that you want Google to find on a priority basis.
I’ve done the steps, but I can’t find my site on Google. Why?
There are two main possibilities. First, confirm if your site is truly not indexed by searching site:yourdomain.com on Google. If nothing appears, check for technical blocks like a noindex tag or a robots.txt error, as detailed in the troubleshooting section above. Second, if your site does appear in that search, it means you are indexed but not ranking highly yet. Indexing makes you eligible to appear; ranking requires ongoing work on content quality, authority, and SEO.
What if my website builder (like Wix or Squarespace) submits my site for me?
While many platforms offer a helpful initial submission feature, it is always recommended to set up your own Google Search Console account. Doing so gives you direct access to invaluable performance data, error reports, security alerts, and indexing tools. This allows you to have full control and insight into your site’s relationship with Google, which is essential for long-term growth.